
How to check the Harley-Davidson load system
Checking the 3 -step cargo system
On this occasion, we are going to perform an eminently practical tutorial to check if the loading system of any motorcycle works correctly.
Before starting with the tests, we will briefly define the components:
The alternator

It consists of a rotor with magnets or magnetic dish, which revolves around a fixed winding called a stoist. Variations in the magnetic field of coils generate alternating current (such as the one we have at home). The faster the engine revolves, the more voltage we get.
The rectifier-regulator

The alternating current is not too useful in a motorcycle, since it does not allow the operation of electronic devices. That is why at the exit of the alternator the regulator is placed, which converts the alternating current into direct current, with positive and negative. This is called rectifying the current.
At the same time, the regulator controls that it does not reach too much voltage to the electrical components, to protect them, eliminating excess current through the chassis.
The battery

It is an element that allows you to store energy from the regulator. In this way, when the engine is stopped or works at low revolutions we can have current to move the starter engine, lights and other electronic components.
Another very important function of the battery is that of electric “shock absorber”, filtering the current that comes from the alternator and through the regulator, so that the electronic components work with great precision and stability.

Test in three steps
To perform a rapid checking of the load system we only need a multimeter capable of reading direct and also alternate current. We will proceed as follows:
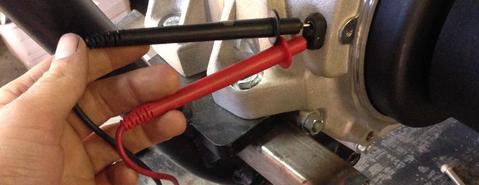
- We put the multimeter in alternate voltage measurement (VAC), disconnect the alternator connector, start the engine and measure the outlet. We should obtain about 40V, which progressively increase if we accelerate (it is essential to consult the data manual data for each year and motorcycle model, as this measurement varies greatly). If the alternator works correctly we go to the next test.
- With the standing engine and contact in "OFF", we measure continuous voltage (VDC) in the battery terminals. It should be 12V or greater. We start the engine and measure again. The voltage should climb up to 13v or more. With this test we have checked the battery status and the rectifier operation. We go to the next test.

- While measuring as in the previous step, we accelerate and check how the voltage is raising, until it stabilizes around 14V although we will accelerate more. This indicates that the current regulator is doing its function correctly, this point can also be verified with the motorcycle voltmeter itself, if it has it.

Check these 3 points will not take us more than 5 minutes, and we can know if the load system works properly or if there is any problem in any of the components. As always, consult the workshop manual to know the specific specific values for the motorcycle you are working with.

Frank Burguera
8 comments
Thank you .You made it so easy to follow the steps.Have a wonderful day
Thank you .You made it so easy to follow the steps.Have a wonderful day
Chicos, ¡muchas gracias poteste video!
Voilà mon problème j ai vérifié mon stator et il monte à plus de 50v a3000mille tours donc c est bon puis j ai vérifié mon régulateur et la j ai 12volt68 en accélérant j ai changé deux fois mon régulateur pensant que le premier était défectueux et toujour le même problème je ne comprend pas j ai un fatboy de 2000
Tengo ese problema. Me a venido de lujo encontrarte. A sido de casualidad. Tengo una esporter de 1998. Muy bien as explicado. Muchas gracias.🛵